Getting Started with CHAPERONg

1. Requirement
The only essential requirement of CHAPERONg is, of course, a functional installation of the GROMACS software run on Linux (Ubuntu ) or Windows (via the Windows Subsystem for Linux, WSL). You can download and install a version by visiting the GROMACS documentation page , or you could find the latest version of GROMACS here .
2. Download CHAPERONg
You can get CHAPERONg for free by visiting the CHAPERONg GitHub repository, or via this instant .
3. Installation
xxx with main or v0.1 as you have it in the downloaded package.Step 1: Copy the downloaded CHAPERONg package to your preferred installation directory.
Step 2: Extract the package with:
|
|
or with:
|
|
Step 3: Enter the extracted CHAPERONg folder:
|
|
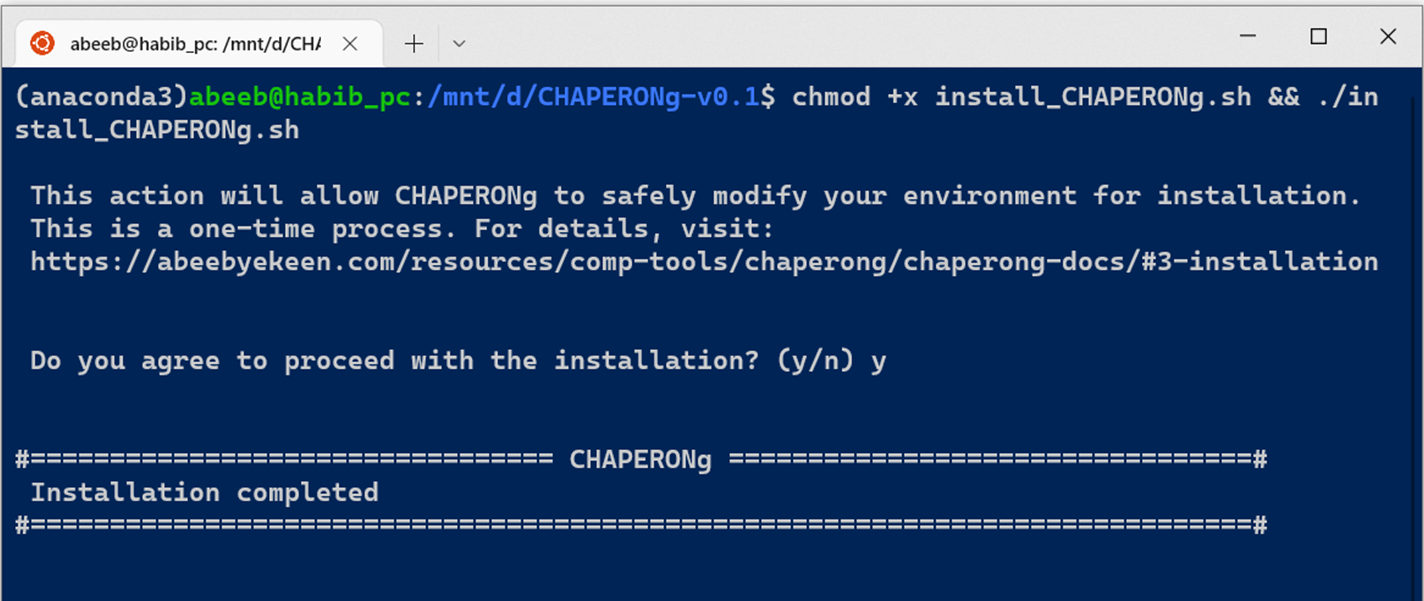
Step 4: Run the installation binary:
|
|
Enter y or yes when prompted for permission. During installation, CHAPERONg will append the installation path to your $PATH via the ~/.bashrc file. After installation, you should see a completion message as shown below:
At any time, you can uninstall CHAPERONg by simply, and CAREFULLY, deleting the lines that have been added your ~/.bashrc file.
4. Optional Dependencies
CHAPERONg will run the entire GROMACS simulation pipelines without additional dependencies installed. However, some other dependencies are required to run some specific analyses facilitated by CHAPERONg. The more of these additional tools you install, the more you are able to maximize the usage and functionalities that CHAPERONg offers.
There are two options by which you can install the dependencies:
- installation in conda environment (recommended), or
- global (system-wide) installation.
4.1. Installing dependencies with conda (recommended)
This approach simplifies the installation of all the optional dependencies (including python-3.8, pymol-2.5.0, imagemagick, numpy, matplotlib, networkx-2.3/networkx-2.5, md-davis, pandas, scipy, etc.), hence maximizing the usage of CHAPERONg.
Step 1: Change to your base anaconda (default) environment:
|
|
Step 2: Run the conda environment setup script conda_env_setup.sh while in the CHAPERONg folder:
|
|
Note that this step requires an internet connection and could take a while to complete depending on the size of the available RAM and the stength of your connection. So, relax and give it time.
In case the above command terminates with the following error:
Collecting package metadata (current_repodata.json): failed
CondaHTTPError: HTTP 000 CONNECTION FAILED for url <https://conda.anaconda.org/conda-forge/linux-64/current_repodata.json>
Elapsed: -
An HTTP error occurred when trying to retrieve this URL.,
try the following sequence of commands instead, entering them in order, line-by-line:
conda config --set ssl_verify false
conda_env_setup.sh
conda config --set ssl_verify true
conda_env_setup.sh script are specified in the conda_dependencies.yml configuration file. Although the default parameters specified in the yaml file contained in the package as you have downloaded it are the most suited for CHAPERONg, you can however alter the specifications based on your other needs. (But do this only if you know what you are doing. 🤣 )You should see a message like the one shown below, indicating that the chaperong environment has been set up successfully.
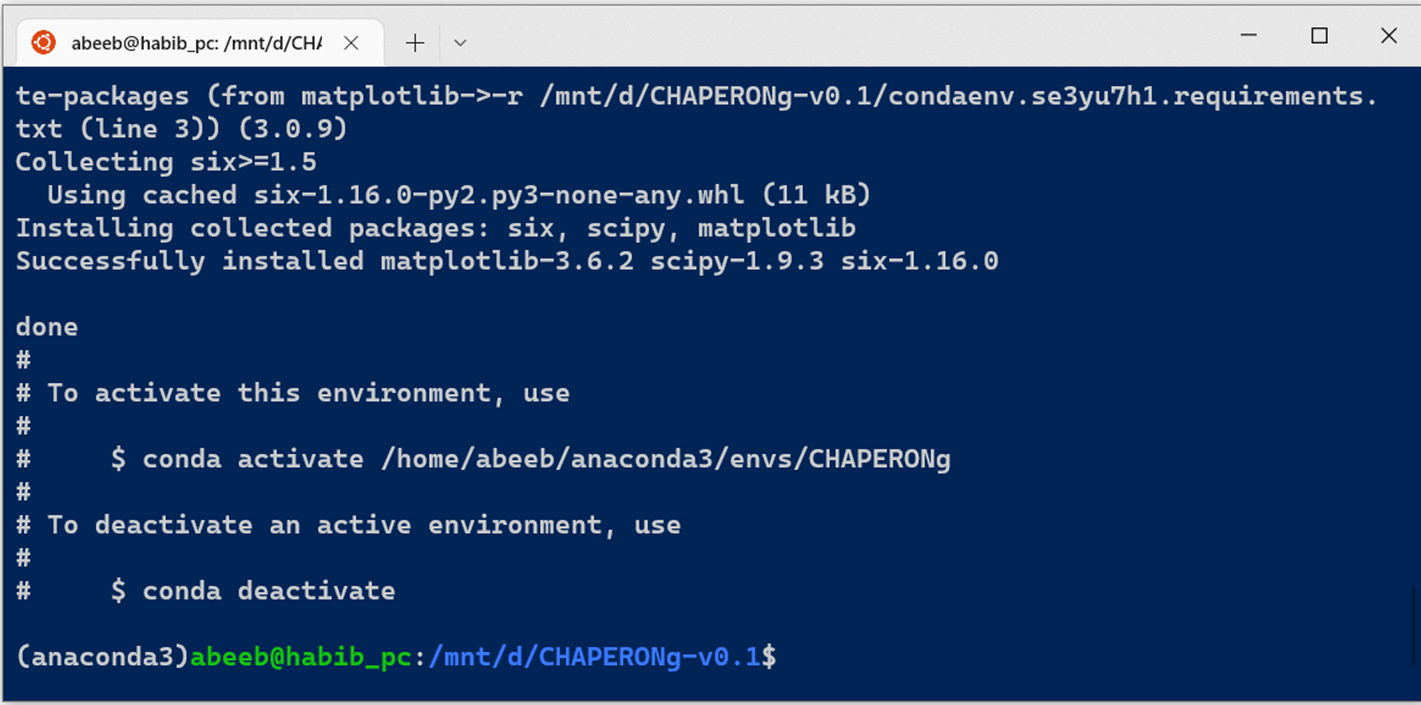
You can confirm the newly created environment named chaperong with:
|
|
You should see chaperong listed among your conda environments.
You can then change into the chaperong environment with:
|
|
4.2. Installing dependencies system-wide (optional)
4.2.1. Option 1: Batch installation
Step 1: To install all of the dependencies at once, enter the following command:
|
|
Step 2: Install/update python libraries as well as a few other packages:
|
|
If you don’t have pip installed, you can first install it with:
sudo apt install python3-pip
And then, run the command:
pip3 install numpy==1.23.4 scipy matplotlib pandas networkx==2.3
or pip3 install numpy==1.23.4 scipy matplotlib pandas networkx==2.5
4.2.2. Option 2: One-by-one installation
1. Python3
2. Grace
|
|
3. PyMOL
You can install PyMOL using apt (as shown below) or visit the PyMOL page to download a distribution of your choice.
|
|
4. ImageMagick
convert program needed in the ImageMagick package is often already installed in most Linux installations. You can run the convert --version command first to check before the next command below. Either way, it shouldn’t do any harm.Step 1: Install the ghostscript interpreter and some libraries that might be missing
|
|
Step 2: Install ImageMagick
|
|
Confirm that the program convert works
|
|
or with:
|
|
5. Networkx2.x
|
|
Or
|
|
sudo apt install python3-pip6. ffmpeg
|
|
I try my best to make the information on this website as accurate as possible, but if you find any errors in the contents of this page or any other page on this website, kindly get in touch with me at contact@abeebyekeen.com. Also, you are welcome to reach out for assistance and collaboration.