Automated Conventional MD Simulation

Learn how CHAPERONg automates GROMACS conventional, unbiased MD simulations.
With CHAPERONg , the conventional GROMACS-based MD simulation pipelines can be automatically run for various systems, viz:
- Protein-only (including protein-protein complex)
- Protein-ligand (small molecule) complex
- Protein-DNA complex
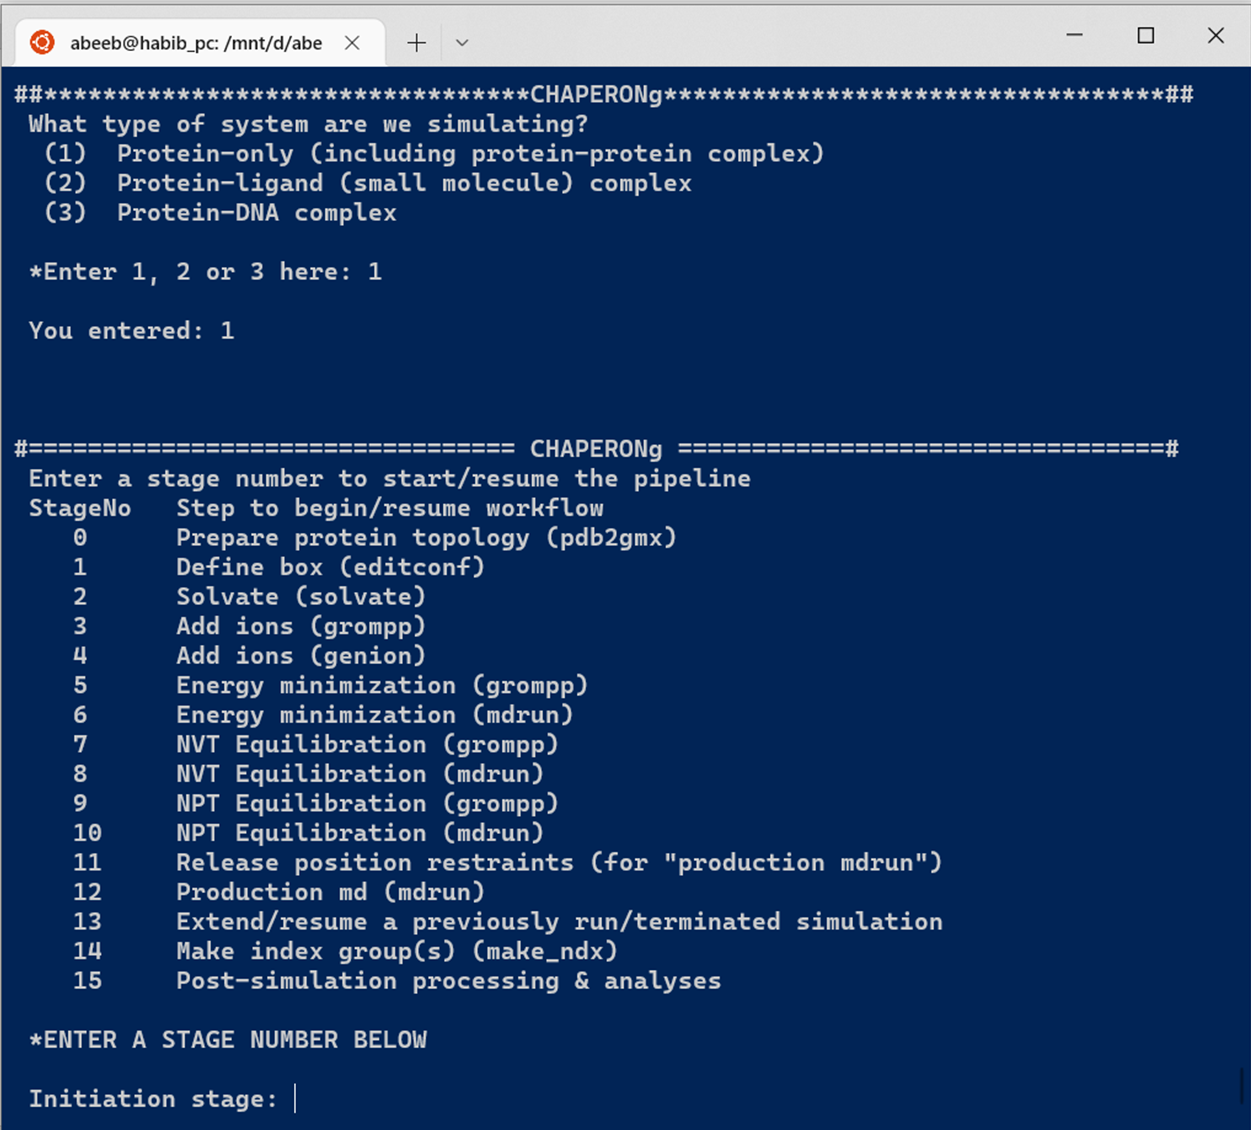
The automated simulation of a protein, protein-protein complex, or protein-DNA complex system facilitated by CHAPERONg features 12 major simulation steps (see Figure below).
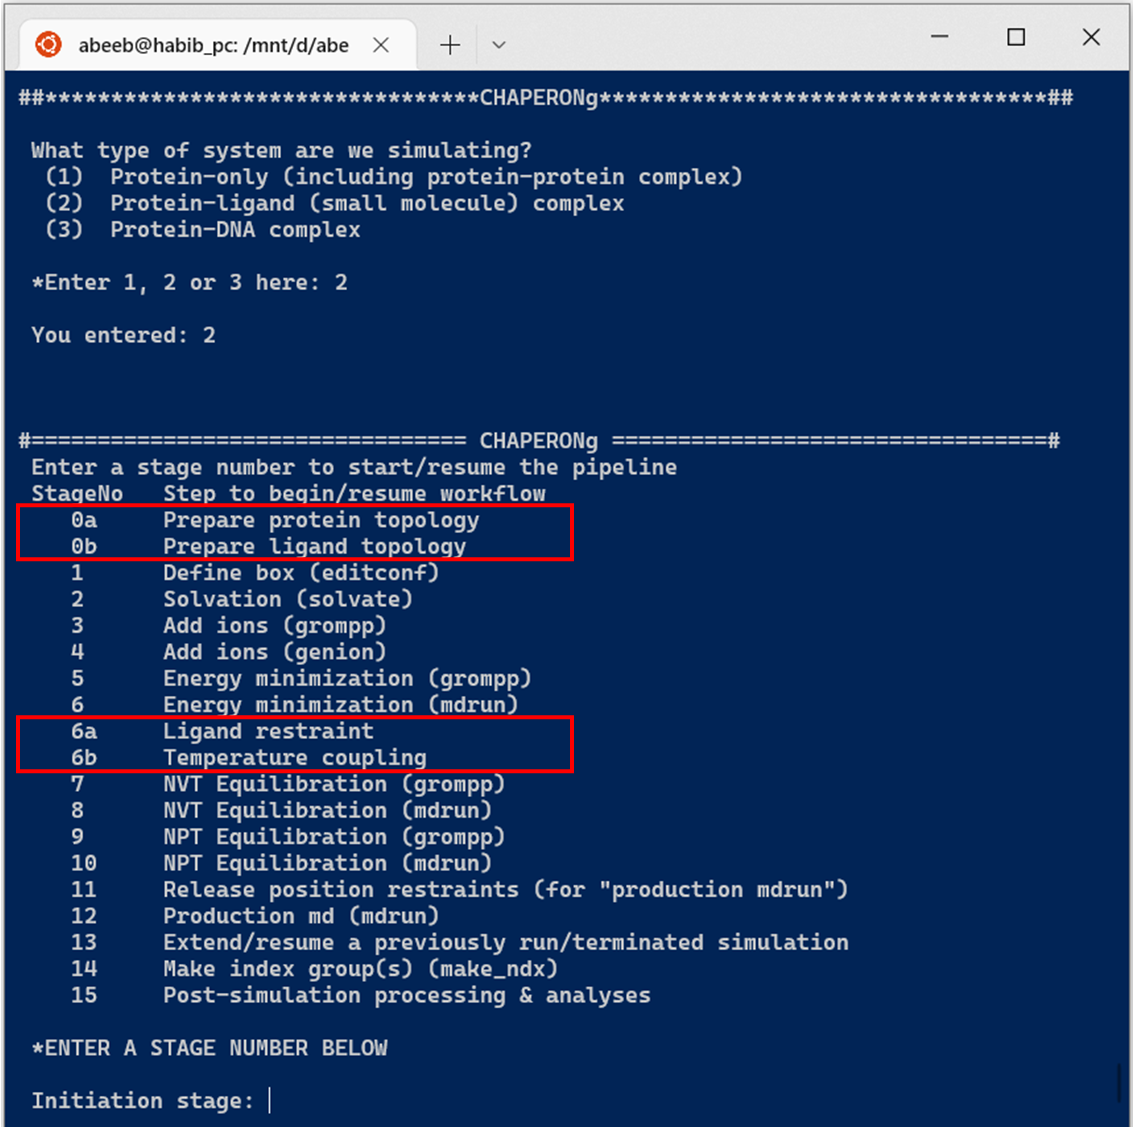
Simulation of a protein-ligand system involves additional steps (see Figure below).
The simulation can be initiated from the very beginning or resumed from any of the steps at any time. To run the entire simulation pipeline, the user needs to provide in the working directory the input coordinate (.pdb or .gro) file and the appropriate GROMACS .mdp files.
If you are not familiar with GROMACS or have never run any MD simulation before, there are a number of excellent GROMACS MD simulation tutorials you may want to start with to have a good understanding of the general MD simulation workflow and how GROMACS works in particular. You can check the GROMACS tutorials by Justin Lemkul , the Strodel Group, the Bonvin Lab , or those on the cgmartini website including the newer and older tutorials.
1. General Simulation Steps
1.1. Protein topology
The essential parameter for this step is the input coordinate file (name) indicated with flag --input or -i, without which the code notifies the user to provide one and exits (except when running an analysis that is independent of an input coordinate). The code recognizes the input file name with or without the .pdb or .gro extension. To completely automate this step without any prompts for additional input, user can provide parameters for the flags --ff (or -f) and --water (or -s). See here for the definitions of these flags. By default, the -ignh option is implemented to ignore Hs in the input file to be re-built by GROMACS.
1.2. Defining simulation box
The simulation automatically proceeds to this step once the above is successfully completed, if the user had initiated the pipeline from the beginning. If resuming simulation from this step, the name of the processed .gro from the previous step has to be passed to --input while launching CHAPERONg. By default, the protein (or complex) is placed at the center of the box, the box type is set to cubic, and the distance of the solute to the edge of the box is set to 1.0 nm. The last two parameters can be changed using the flags --bt (or -b) and --dist.
1.3. Solvation
The spc216.gro solvent configuration is used by default. The water model can be set using the --water or -s parameter.
1.4. Adding ions
The GROMACS preprocessor (grompp) module requires a .mdp file, in addition to the output of the previous step, to generate a .tpr file that will then be used to add the ions. The .mdp file should be named as ions.mdp and placed in the working directory. The generated .tpr file is the supplied to the genion tool that adds the ions needed. The default is to neutralize the system with ions and the names of the positive and negative ions (default names are NA and CL) can be specified using the --pname (or -P) and --nname (or -N) flags. Additionally, you can set a target salt concentration using the flag --conc (or -c).
1.5. Energy minimization
The grompp requires a .mdp file named as either em.mdp or minim.mdp to generate an em.tpr which is then passed to mdrun for energy minimization. The CPU threads/cores and GPU usage and allocation can be controlled using the relevant flags. After minimization, quality assurance parameters are calculated using the gmx energy module so that the user can monitor the status of the system. At this stage, CHAPERONg extracts the Potential Energy term and creates a finished .png figure. This figure and the original .xvg plot from GROMACS are saved in a folder named postEM_thermodynamics. In the case of a Protein-DNA simulation, CHAPERONg will automatically create a Protein-DNA index group in preparation for the subsequent steps.
1.6. NVT and NPT equilibration
The NVT and NPT equilibration steps require .mdp files in the working directory named as nvt.mdp and npt.mdp, respectively. In the case of a Protein-ligand simulation, CHAPERONg (if run in full-auto mode) checks and updates the temperature cooling groups (tc-grps) in the .mdp files and make appropriate adjustment, if required, prior to equilibration. Backup copy of the original .mdp files are made so that the user can always revert to them if needed. After the NVT and NPT equilibrations, other quality assurance parameters including the Temperature, Pressure, and Density terms are calculated for the user to monitor the convergence of some thermodynamic parameters. The .xvg plots of these parameters and the finished .png figures are saved in the postEM_thermodynamics folder created after the energy minimization step.
1.7. Production MD
The grompp run to generate a .tpr requires a .mdp file in the working directory named as md.mdp. The output md.tpr is then parsed to mdrun for production MD. The prefix for the output files to be generated can be set with the --deffnm (or -p) flag.
1.8. Extend/resume production MD
The user can begin at this stage to resume a terminated production MD run, or to extend a previously completed MD run. It is necessary to provide the flag -p or -i (if -p was not profiled in the previous run).
2. Additional Simulation Steps for Protein-Ligand System
In the simulation of a protein-ligand system, the following additional steps are involved and covered in the automation.
2.1. Ligand topology
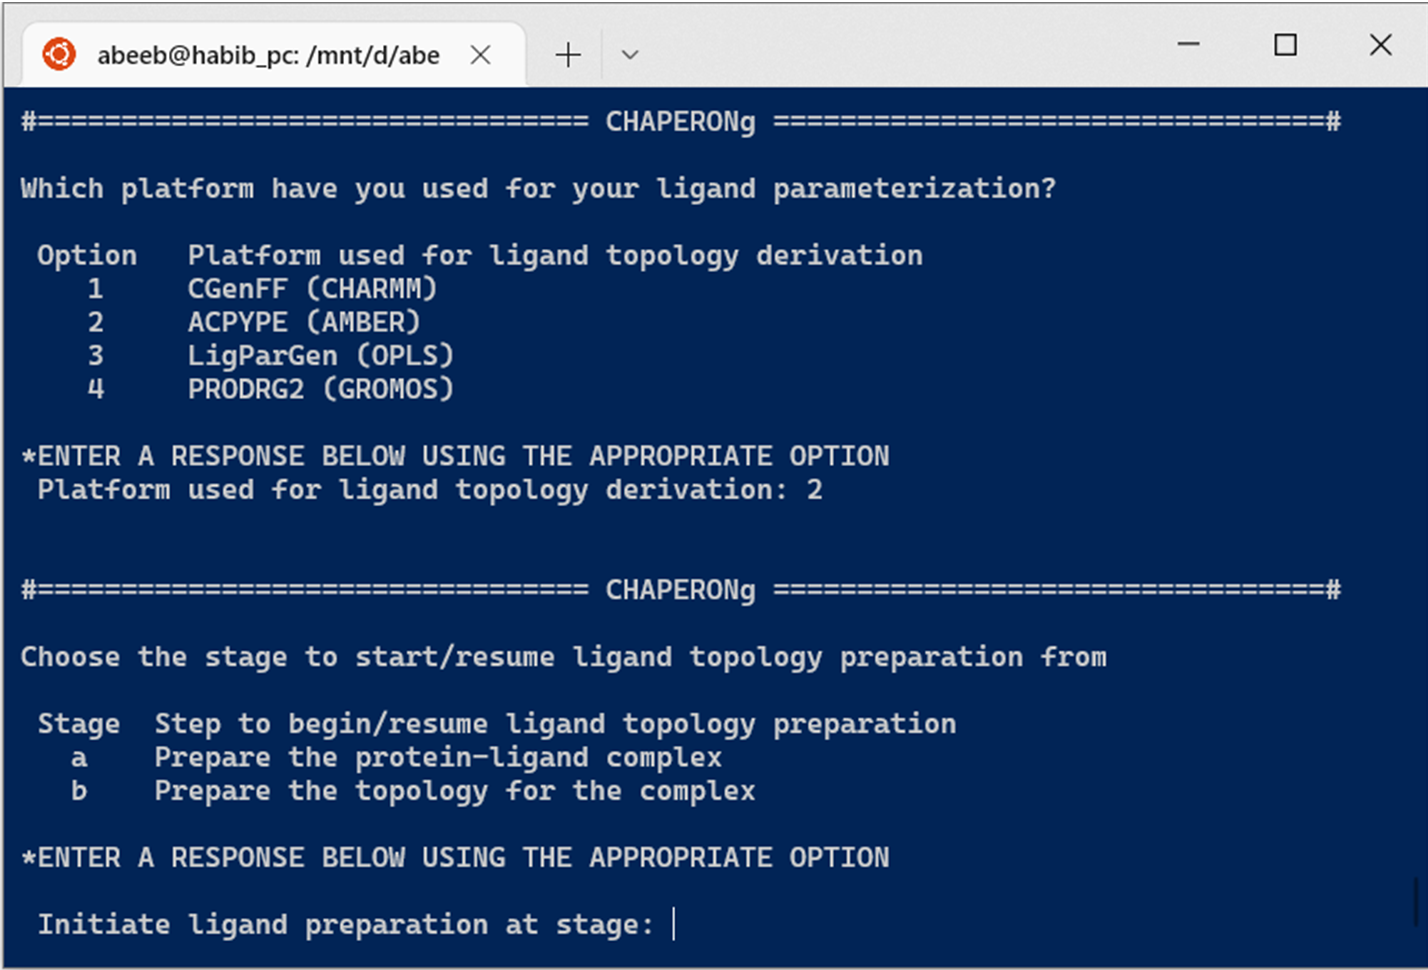
As shown in the Figure below, CHAPERONg automates the processing of topologies obtained from several common parameterization programs and servers, including the CGenFF (the official CHARMM General Force Field server), the ACPYPE , the PRODRG2 (for GROMOS), and the LigParGen (for OPLS) servers. Ligand parameterizations with any of the listed automation servers simply involves uploading the ligand of interest on the servers and downloading the topology parameters generated upon a successful run.
In the case of parameterization using CGenFF, simply put the following in the working directory:
The last two above would have been downloaded from the MacKerell Lab website. The user can choose to initiate the ligand topology run at any of the 4 steps shown in the Figure above. If starting from step a, the user might need to make appropriate corrections to the input .mol2 ligand (such as correction of the compound name as well as residue names and numbers). If the .mol2 ligand has been obtained from a program that does not list the atom bonds order properly, you can use the perl script written by Dr. Justin Lemkul to reorder the bond order to follow the acceptable convention. Save the script as sort_mol2_bonds.pl, and place it in the working directory. If found in the working directory, CHAPERONg will run the script on the input ligand. However, ligands that have been processed by or obtained via software packages like PyMOL and Schrödinger/Maestro often do not have the bond order problem and can typically be used directly.
For topology parameters obtained from ACPYPE, PRODRG2, or LigParGen, extract the zipped (.zip) file downloaded from any of servers, rename the extracted folder/subfolder containing the topology files as acpype, prodrg, or ligpargen (as the case may be), and simply place the renamed folder in the working directory and your are set to launch CHAPERONg. You can initiate the ligand topology preparation run at any of the two steps shown in the Figure below.
2.2. Ligand restraint and temperature coupling
CHAPERONg completely automates these steps, generating appropriate index groups and modifying the topol.top file accordingly. The modifications made to the topol.top are printed on the terminal at every step, and a backup of the file is made at every point so the user can revert to previous versions of the file if needed.
I try my best to make the information on this website as accurate as possible, but if you find any errors in the contents of this page or any other page on this website, I would greatly appreciate that you kindly get in touch with me at contact@abeebyekeen.com. Also, you are welcome to reach out for assistance and collaboration.